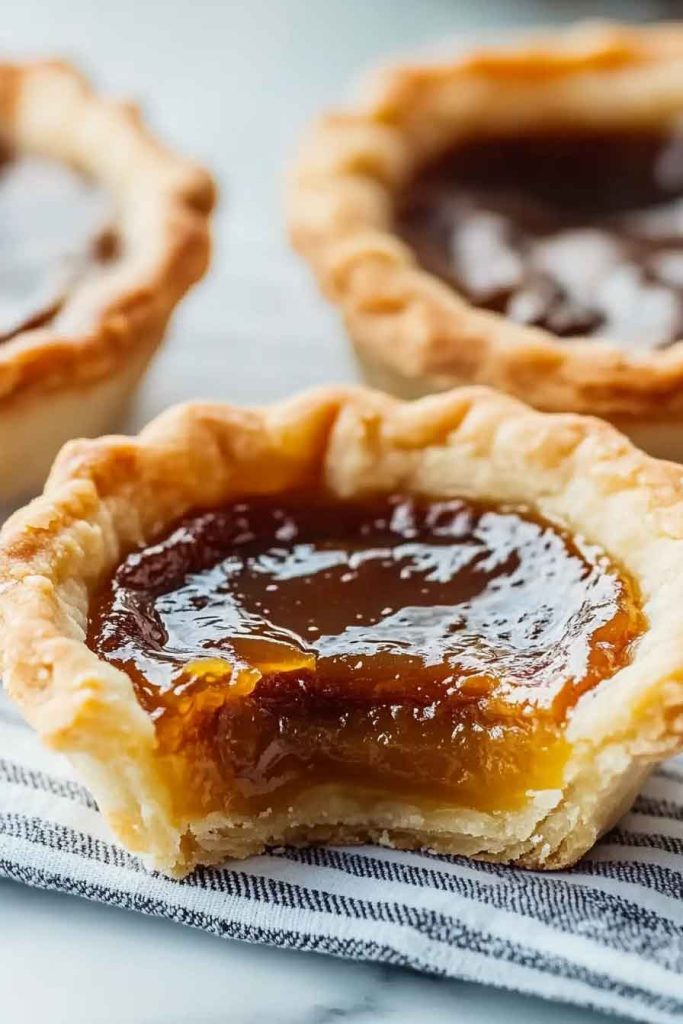
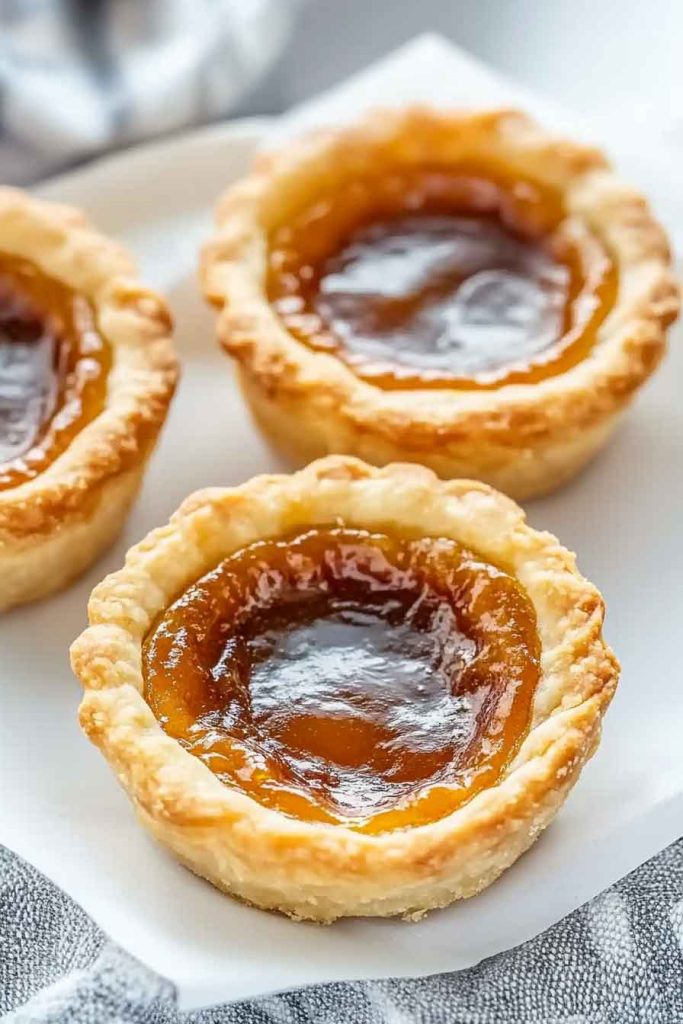
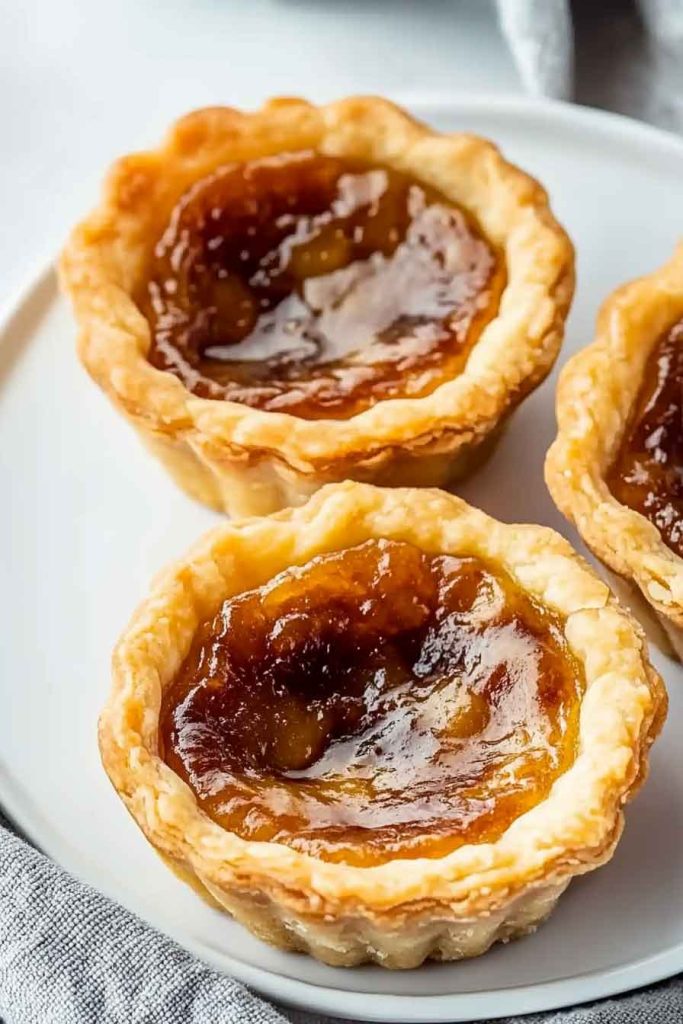
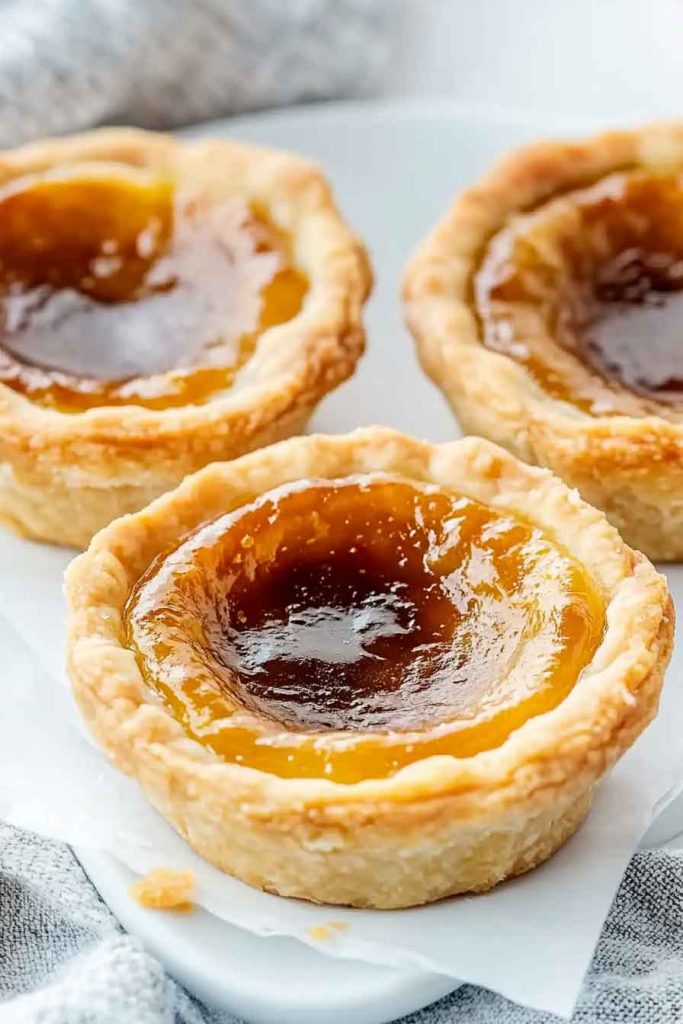
When I made these Best Classic Canadian Butter Tarts, the kitchen smelled like brown sugar and butter melting together.
The filling turned gooey and rich, tucked inside a flaky golden crust that crumbled just right.
I remember waiting for them to cool, even though I wanted to taste one right away.
These tarts are sweet, buttery, and full of that old-fashioned charm.
They’re perfect for holidays, tea time, or anytime you want a little indulgence.
Let’s bake them together—you’ll love how simple and melt-in-your-mouth they are.
Why You’ll Love This Recipe
- Authentic Canadian Classic: This recipe stays true to the traditional butter tart that Canadians have loved for over a century.
- Perfect Texture: The filling sets just right with a slightly gooey center and crisp, flaky pastry.
- Customizable: Add your favorite mix-ins like raisins, pecans, walnuts, or chocolate chips.
- Great for Sharing: Makes a dozen tarts, perfect for gatherings, potlucks, or gift-giving.
- Simple Ingredients: Uses pantry staples you likely already have on hand.
What You Need to Know Before You Start
Prep Time & Cook Time:
- Prep Time: 30 minutes (plus 30 minutes chill time)
- Cook Time: 15-18 minutes
- Total Time: About 1 hour 15 minutes
Servings: This recipe makes 12 butter tarts, perfect for sharing with family and friends. Double the batch if you’re serving a crowd or want extras to freeze.
Difficulty: Easy to moderate. The pastry requires some patience, but the filling comes together quickly. Great for bakers of all skill levels.
Required Kitchen Tools
- Muffin tin (standard 12-cup)
- Rolling pin
- Mixing bowls (medium and large)
- Pastry cutter or fork
- Round cookie cutter (about 4 inches)
- Whisk or electric mixer
- Measuring cups and spoons
- Parchment paper or cooking spray
Ingredients
These butter tarts combine a tender, flaky pastry with a sweet, buttery filling that’s simply irresistible. The simple ingredients work together to create something truly special.
For the Pastry:
- 2 cups (250g) all-purpose flour, plus extra for rolling
- 2 tablespoons brown sugar
- 1/2 teaspoon salt
- 1/2 cup (115g) cold shortening, cut into small pieces
- 1/4 cup (57g) cold butter, cut into small pieces
- 4-6 tablespoons ice water
For the Filling:
- 1/2 cup (115g) butter, melted and slightly cooled
- 1 cup (220g) packed brown sugar
- 2 large eggs, at room temperature
- 2 tablespoons corn syrup
- 1 tablespoon vanilla extract
- Pinch of salt
Optional Mix-ins (choose one or combine):
- 3/4 cup raisins
- 3/4 cup chopped pecans
- 3/4 cup chopped walnuts
- 1/2 cup chocolate chips
Variations for Canadian Butter Tarts
- Maple Butter Tarts: Replace half the corn syrup with pure maple syrup for a distinctly Canadian twist.
- Mixed Nut Tarts: Combine pecans and walnuts for extra texture and flavor.
- Chocolate Lover’s Version: Use chocolate chips alone or mix them with pecans.
- Traditional Raisin: Stick with raisins only for the most classic version.
- Plain and Simple: Skip the mix-ins entirely for a pure, gooey butter tart experience.
How to Make Best Classic Canadian Butter Tarts Step-by-Step Instructions
1. Prepare the Pastry
In a large bowl, whisk together flour, brown sugar, and salt. Add the cold shortening and butter pieces. Using a pastry cutter or fork, work the fats into the flour until the mixture resembles coarse crumbs with some pea-sized pieces remaining.
2. Form the Dough
Sprinkle ice water over the mixture, one tablespoon at a time, stirring gently with a fork. Add just enough water until the dough starts to come together. Gather the dough into a ball, flatten into a disk, wrap in plastic wrap, and refrigerate for 30 minutes.
3. Roll and Cut the Pastry
Preheat your oven to 375°F (190°C). On a lightly floured surface, roll out the chilled dough to about 1/8 inch thickness. Using a round cookie cutter, cut out 12 circles slightly larger than your muffin cups. Gently press each circle into the muffin tin, making sure not to stretch the dough.
4. Make the Filling
In a medium bowl, whisk together melted butter and brown sugar until well combined. Add eggs one at a time, whisking after each addition. Stir in corn syrup, vanilla extract, and a pinch of salt until the mixture is smooth and well blended.
5. Add Mix-ins and Fill
If using raisins, pecans, walnuts, or chocolate chips, divide them evenly among the pastry-lined muffin cups, adding about 1-2 tablespoons to each. Pour the filling over the mix-ins, filling each cup about two-thirds full. The filling will bubble up during baking.
6. Bake
Bake for 15-18 minutes until the filling is set but still has a slight jiggle in the center. The pastry edges should be lightly golden. Watch carefully to avoid overbaking, as you want the centers to remain slightly gooey.
7. Cool
Let the tarts cool in the pan for 10 minutes, then carefully run a knife around the edges and transfer to a wire rack. The filling will continue to set as it cools.
Serving and Decoration
Canadian Butter Tarts are best enjoyed at room temperature when the filling has that perfect gooey texture. Serve them plain or with a small dollop of whipped cream or vanilla ice cream for an extra special treat. They’re wonderful alongside afternoon tea or coffee, and they make a delightful ending to any meal. For a festive presentation, dust lightly with powdered sugar or arrange on a decorative platter.
How to Serve Canadian Butter Tarts
These versatile tarts work beautifully for many occasions:
- Dessert Tables: Display on tiered stands for parties, weddings, or holiday gatherings.
- Afternoon Tea: Serve alongside other pastries and hot tea for a proper Canadian tea time.
- Lunch Box Treats: Pack individually for a sweet midday surprise.
- Gift Giving: Arrange in decorative boxes lined with parchment paper for homemade gifts.
- Potluck Favorite: Bring to community events where they’re sure to disappear quickly.
Storing Canadian Butter Tarts
- Room Temperature: Store in an airtight container for up to 3 days. The filling stays gooey and delicious.
- Refrigerator: Keep in an airtight container for up to 1 week. Bring to room temperature before serving for the best texture.
- Freezer: Wrap individual tarts in plastic wrap, then place in a freezer bag for up to 3 months. Thaw at room temperature for 1-2 hours before serving.
- Pastry Dough: Unbaked pastry can be wrapped tightly and frozen for up to 2 months.
Tips and Tricks for Success
- Keep Everything Cold: Cold butter and shortening create the flakiest pastry. Chill your dough if it becomes too warm while working.
- Don’t Overfill: Fill tarts only two-thirds full to prevent overflow during baking.
- Watch the Bake Time: The centers should still jiggle slightly when done. They’ll firm up as they cool.
- Use Room Temperature Eggs: This helps the filling mix smoothly and bake evenly.
- Prevent Sticking: Lightly grease your muffin tin or use non-stick spray, even if it’s a non-stick pan.
- Test One First: If unsure about baking time, bake one tart first to check doneness before committing the whole batch.
Nutrition
| Nutrient | Per Tart (1 of 12) |
|---|---|
| Calories | 285 |
| Total Fat | 15g |
| Saturated Fat | 7g |
| Cholesterol | 55mg |
| Sodium | 180mg |
| Total Carbohydrates | 36g |
| Dietary Fiber | 1g |
| Sugars | 22g |
| Protein | 3g |
Note: Nutritional values are approximate and will vary based on specific ingredients and mix-ins used.
PrintBest Classic Canadian Butter Tarts
- Prep Time: 30 minutes (plus 30 minutes chill time)
- Cook Time: 15-18 minutes
- Total Time: 0 hours
- Yield: 12 butter tarts 1x
- Category: Dessert / Canadian Baking / Pastries
Ingredients
For the Pastry:
- 2 cups (250g) all-purpose flour, plus extra for rolling
- 2 tablespoons brown sugar
- 1/2 teaspoon salt
- 1/2 cup (115g) cold shortening, cut into small pieces
- 1/4 cup (57g) cold butter, cut into small pieces
- 4–6 tablespoons ice water
For the Filling:
- 1/2 cup (115g) butter, melted and slightly cooled
- 1 cup (220g) packed brown sugar
- 2 large eggs, at room temperature
- 2 tablespoons corn syrup
- 1 tablespoon vanilla extract
- Pinch of salt
Optional Mix-ins:
- 3/4 cup raisins, or chopped pecans, or chopped walnuts, or 1/2 cup chocolate chips
Instructions
- Make Pastry: Whisk flour, brown sugar, and salt in a large bowl. Cut in cold shortening and butter until mixture resembles coarse crumbs. Add ice water one tablespoon at a time until dough comes together. Form into a disk, wrap, and chill for 30 minutes.
- Prepare Tins: Preheat oven to 375°F (190°C). Lightly grease a 12-cup muffin tin.
- Roll and Line: Roll chilled dough to 1/8 inch thickness. Cut 12 circles and press into muffin cups.
- Make Filling: Whisk melted butter and brown sugar. Add eggs one at a time, then stir in corn syrup, vanilla, and salt until smooth.
- Fill Tarts: Divide mix-ins among pastry cups if using. Pour filling over mix-ins, filling each cup two-thirds full.
- Bake: Bake 15-18 minutes until filling is set with a slight jiggle in the center. Pastry edges should be lightly golden.
- Cool: Let cool in pan for 10 minutes, then transfer to a wire rack to cool completely.
Canadian Butter Tarts FAQs
Yes, the pastry dough can be made up to 2 days ahead and kept refrigerated, or frozen for up to 2 months.
Make sure to bake the tarts long enough for the filling to set. The center should jiggle slightly but not be liquid. The filling will firm up more as it cools.
You can, but shortening creates a flakier texture. For best results, use the combination of both.
Baking time makes the difference. Less time creates runnier centers, while a few extra minutes creates firmer tarts. It’s a personal preference.
Corn syrup is traditional and creates the right texture, but you can substitute with golden syrup or maple syrup for a different flavor profile.