
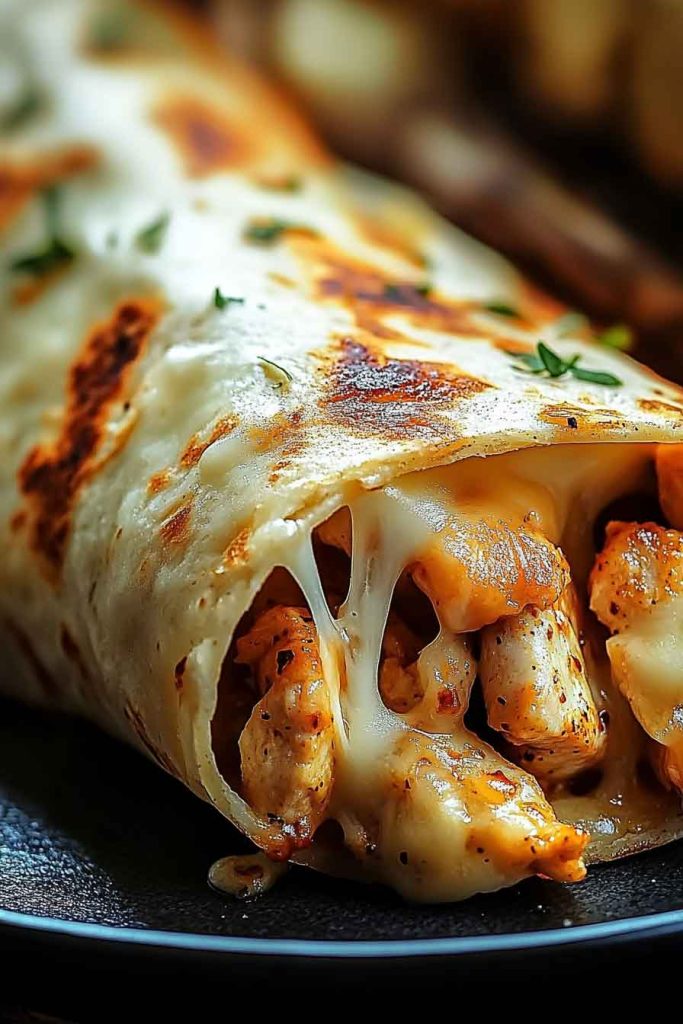
When I made these Best Cheesy Garlic Chicken Wraps, the smell of garlic butter and melted cheese filled the kitchen.
The wraps turned golden and crisp, stuffed with juicy chicken and gooey cheese.
I remember taking the first bite and thinking—it tastes like comfort rolled up.
These wraps are quick, flavorful, and perfect for lunch or dinner.
They’re easy to make and even easier to love.
Let’s wrap them up together—you’ll see why they disappear so fast.
Why You’ll Love This Recipe
- Quick and Easy: Ready in just 30 minutes from start to finish.
- Creamy and Cheesy: The combination of cream cheese and cheddar creates an incredibly rich filling.
- Kid-Friendly: Even picky eaters love these wraps.
- Budget-Friendly: Made with simple ingredients you probably already have.
- Versatile: Perfect for lunch boxes, quick dinners, or meal prep.

What You Need to Know Before You Start
Prep Time & Cook Time:
- Prep Time: 10 minutes
- Cook Time: 15 minutes
- Total Time: 25 minutes
Servings: This recipe makes 4 large wraps, enough for 4 people. Hungry crowd? Double the recipe easily.
Difficulty: Beginner-friendly. If you can cook chicken and melt cheese, you can make these wraps.
Required Kitchen Tools
- Large skillet or frying pan
- Cutting board and sharp knife
- Mixing bowl
- Spatula or wooden spoon
- Measuring spoons
Ingredients for Cheesy Garlic Chicken Wraps
These wraps come together with simple ingredients that create big flavor. The cream cheese makes everything silky smooth, while garlic brings warmth and depth.
For the Filling:
- Chicken: 2 cups cooked chicken, diced or shredded (about 2 medium chicken breasts)
- Cream Cheese: 4 ounces, softened to room temperature
- Cheddar Cheese: 1 cup shredded sharp cheddar
- Garlic: 3 cloves, minced (or 1 teaspoon garlic powder)
- Onion Powder: 1/2 teaspoon
- Black Pepper: 1/4 teaspoon
- Parsley: 2 tablespoons fresh, chopped (or 1 teaspoon dried)
For Assembly:
- Tortillas: 4 large flour tortillas (10-inch size works best)
- Olive Oil: 1 tablespoon
- Butter: 1 tablespoon
Variations for Cheesy Garlic Chicken Wraps
- Add Vegetables: Mix in sautéed spinach, bell peppers, or mushrooms for extra nutrition.
- Try Different Cheese: Swap cheddar for mozzarella, pepper jack, or a Mexican blend.
- Add Bacon: Crumbled bacon adds a smoky, salty touch.
- Make It Spicy: Add a pinch of red pepper flakes or diced jalapeños.
- Use Ranch Seasoning: Mix a tablespoon of ranch seasoning into the cream cheese for extra flavor.
How to Make Cheesy Garlic Chicken Wraps Step-by-Step Instructions
1. Prepare the Chicken
If using raw chicken, season with a pinch of salt and pepper. Cook in a skillet with olive oil over medium heat for 6-7 minutes per side until golden and cooked through. Let it rest, then dice into small pieces. You can also use leftover rotisserie chicken to save time.
2. Make the Creamy Garlic Mixture
In a mixing bowl, combine softened cream cheese, minced garlic, onion powder, black pepper, and parsley. Stir until smooth and well blended.
3. Combine Chicken and Cheese
Add the diced chicken to the cream cheese mixture. Fold in the shredded cheddar cheese. Mix everything together until the chicken is well coated.
4. Warm the Tortillas
Heat tortillas in a dry skillet for 15-20 seconds on each side. This makes them soft and easier to fold without cracking.
5. Fill the Wraps
Place a warm tortilla on a clean surface. Spoon about 1/2 cup of the chicken mixture down the center. Fold in the sides, then roll tightly from bottom to top.
6. Toast the Wraps
Heat butter and olive oil in a large skillet over medium heat. Place wraps seam-side down in the pan. Cook for 2-3 minutes per side until golden brown and crispy. The cheese inside will melt beautifully.
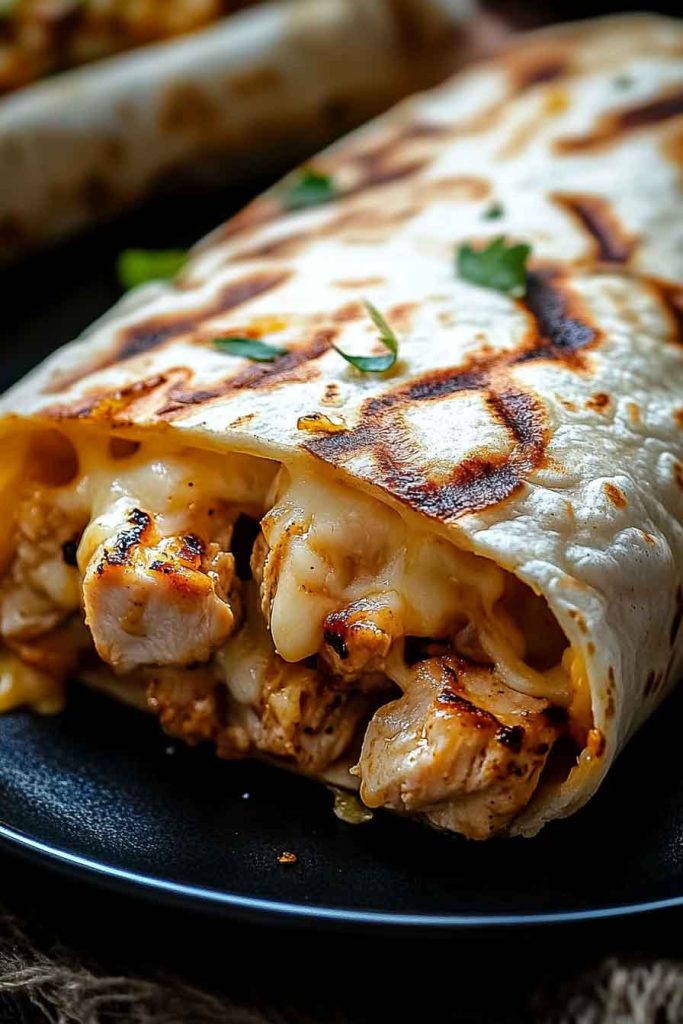
Serving and Decoration
Serving Suggestions: Slice each wrap in half at an angle and serve immediately while hot and crispy. The melted cheese should stretch beautifully when you pull the halves apart.
Side Dish Ideas:
- Fresh green salad with ranch dressing
- Sweet potato fries or regular fries
- Tortilla chips with salsa or guacamole
- Coleslaw for a crunchy contrast
- Tomato soup for dipping
Garnish Options: Sprinkle extra fresh parsley on top, add a dollop of sour cream, or drizzle with hot sauce for those who like heat.
How to Serve Cheesy Garlic Chicken Wraps
These wraps are incredibly versatile and fit many occasions:
- Lunch Boxes: Wrap in foil and pack for school or work lunches.
- Game Day: Cut into pinwheels for easy appetizers.
- Quick Dinner: Serve with a simple side salad for a complete meal.
- Party Food: Make mini versions using smaller tortillas.
- Picnics: Transport easily and eat at room temperature.
Storing Cheesy Garlic Chicken Wraps
Refrigerator Storage: Wrap each cooled wrap individually in plastic wrap or foil. Store in an airtight container for up to 3 days in the refrigerator.
Freezer Storage: Freeze wrapped wraps in a freezer bag for up to 2 months. Thaw overnight in the fridge before reheating.
Reheating Instructions:
- Oven: Wrap in foil and heat at 350°F for 10-15 minutes.
- Skillet: Heat over medium-low for 3-4 minutes per side.
- Microwave: Heat for 60-90 seconds, though they will be softer, not crispy.
Tips and Tricks for Success
For the Best Results:
- Always soften cream cheese to room temperature. Cold cream cheese creates lumps and does not mix smoothly.
- Do not overfill the wraps. Too much filling makes them hard to roll and messy to eat.
- Press wraps gently with a spatula while cooking. This helps seal them and creates an even golden crust.
- Use fresh garlic when possible. The flavor is much brighter than garlic powder.
Common Mistakes to Avoid:
- Skipping the toasting step. The crispy outside makes these wraps special.
- Rolling too loosely. Tight rolls stay together better.
- Using cold tortillas. They crack when you try to fold them.
Make-Ahead Tips: Prepare the chicken and cream cheese mixture up to 2 days ahead. Store in the fridge, then assemble and cook when ready to eat.
Nutrition
| Nutrient | Per Wrap |
|---|---|
| Calories | 485 |
| Protein | 32g |
| Carbohydrates | 38g |
| Fat | 22g |
| Saturated Fat | 11g |
| Cholesterol | 95mg |
| Sodium | 680mg |
| Fiber | 2g |
| Sugar | 2g |
Nutritional values are approximate and may vary based on specific ingredients used.
PrintBest Cheesy Garlic Chicken Wraps
- Prep Time: 10 minutes
- Cook Time: 15 minutes
- Total Time: 25 minutes
- Yield: 4 wraps 1x
- Category: Main Dish / Lunch / Dinner
Ingredients
- 2 cups cooked chicken, diced
- 4 ounces (113g) cream cheese, softened to room temperature
- 1 cup (113g) shredded sharp cheddar cheese
- 3 cloves garlic, minced (or 1 teaspoon garlic powder)
- 1/2 teaspoon onion powder
- 1/4 teaspoon black pepper
- 2 tablespoons fresh parsley, chopped (or 1 teaspoon dried)
- 4 large flour tortillas (10-inch)
- 1 tablespoon olive oil
- 1 tablespoon butter
Instructions
- Cook Chicken: If using raw chicken, season with salt and pepper. Cook in a skillet with olive oil over medium heat for 6-7 minutes per side until fully cooked. Dice into small pieces. Or use pre-cooked chicken.
- Make Garlic Mixture: In a mixing bowl, combine softened cream cheese, minced garlic, onion powder, black pepper, and parsley. Mix until smooth.
- Combine: Add diced chicken and shredded cheddar to the cream cheese mixture. Stir until everything is well coated.
- Warm Tortillas: Heat tortillas in a dry skillet for 15-20 seconds per side to soften.
- Fill Wraps: Place about 1/2 cup of chicken mixture down the center of each tortilla. Fold in sides, then roll tightly.
- Toast: Heat butter and olive oil in a skillet over medium heat. Place wraps seam-side down and cook 2-3 minutes per side until golden and crispy.
- Serve: Slice in half and serve hot.
Cheesy Garlic Chicken Wraps FAQs
Yes. Rotisserie chicken works perfectly and saves time. Just remove the skin and shred or dice the meat.
Warm them first. Cold tortillas crack easily. Heat them briefly in a skillet or microwave wrapped in a damp paper towel for 15 seconds.
You can prepare the filling up to 2 days ahead. Assemble and cook the wraps fresh for the best texture.
Cook them right before serving. The toasting step creates a barrier that keeps them crispy. If packing for lunch, keep any wet toppings separate.
Yes. Place seam-side down on a baking sheet. Brush with melted butter and bake at 375°F for 12-15 minutes until golden.