
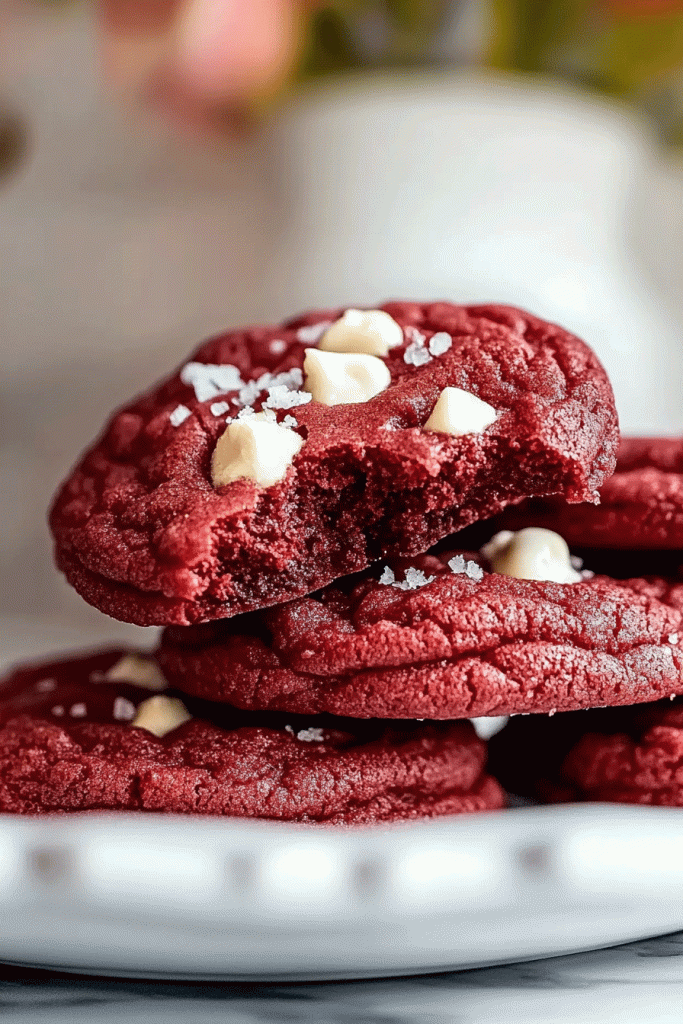
Wanna know what’s soft, sweet, and kinda messy—in the best way? Yep, these gooey red cookie treats. They’re like a hug in cookie form.
They’re warm, bright red, and full of melty goodness. Every bite is soft and sticky and sweet. I always sneak one before they cool.
These are my go-to for holidays… or honestly, anytime I need a happy snack. Kids love them. Grown-ups do too.
Let’s make a batch together. You’ll love how easy they are—and how fast they disappear!
Why You’ll Love This Recipe
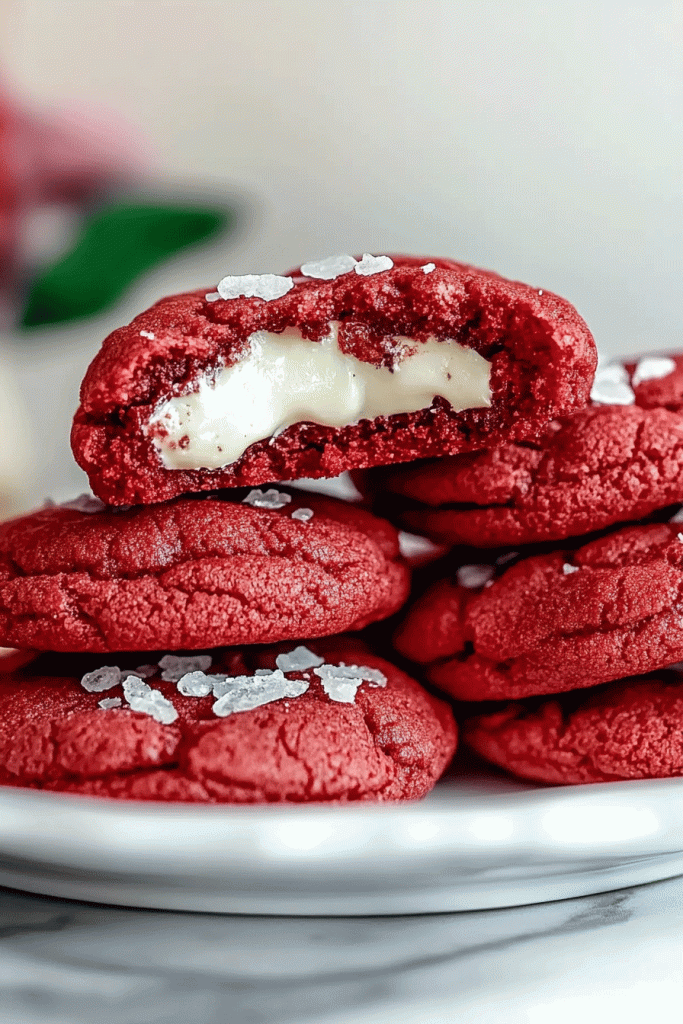
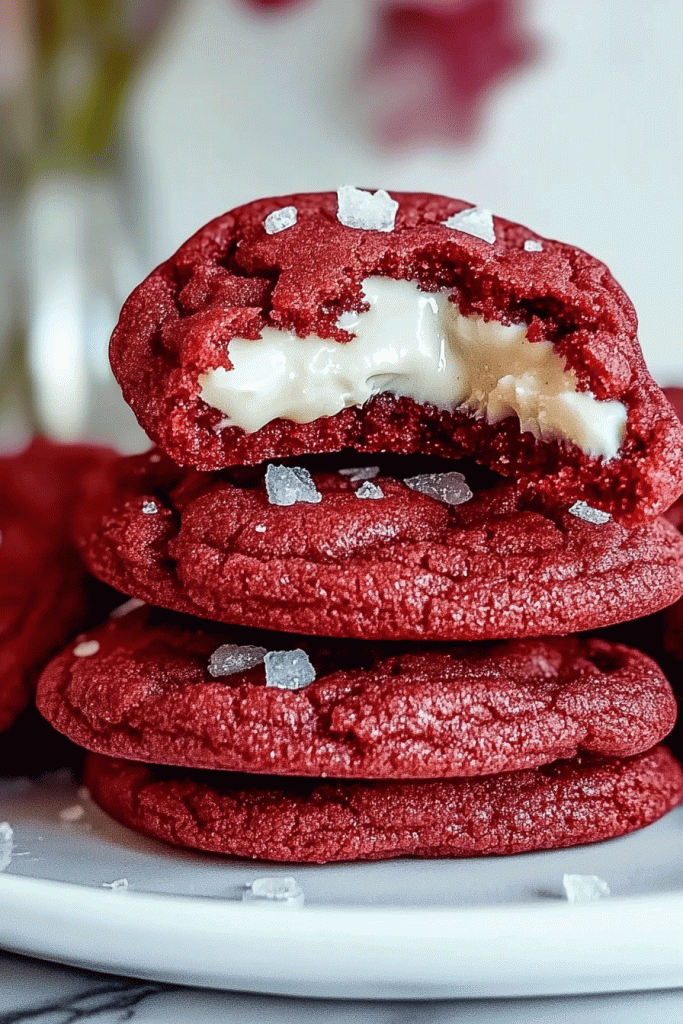
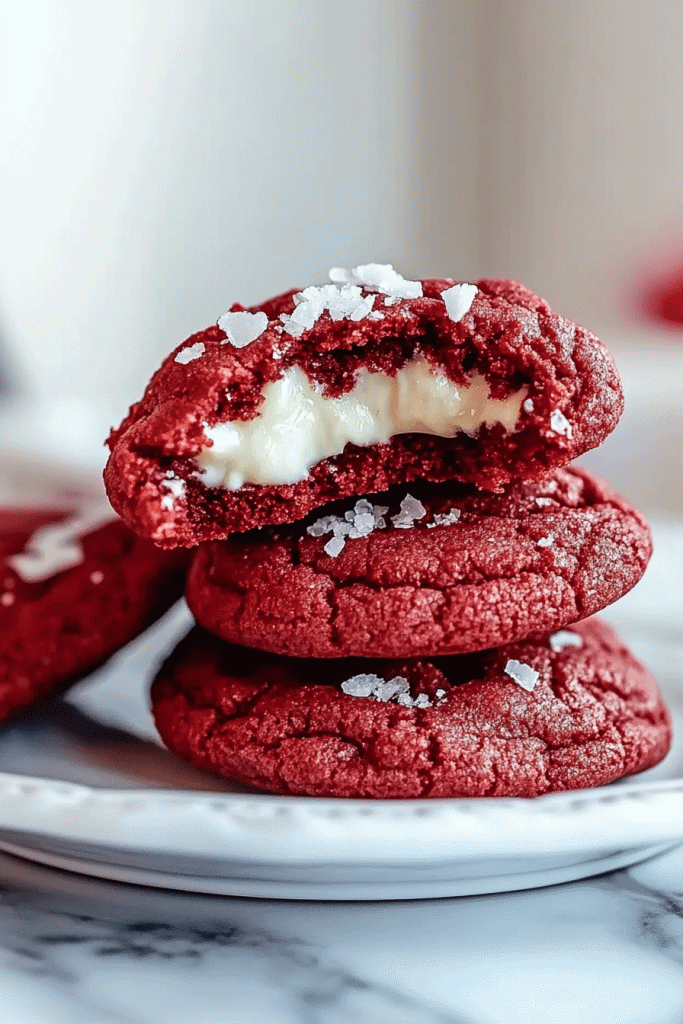
- Balanced Texture and Flavor: These cookies are soft around the edges, gooey in the center, and lightly crisped on the bottom. The cream cheese adds a subtle tang that balances the sweetness.
- Time-Saving Base: Using red velvet cake mix means you skip several steps. You don’t have to measure out dry ingredients individually—but you still get the flavor of a homemade cookie.
- Great for All Ages: Kids love the color and sweetness, while adults appreciate the buttery depth and that hint of cream cheese.
What You Need to Know Before You Start
Prep Time & Cook Time
- Prep Time: 20 minutes to mix + 30 minutes chill time
- Bake Time: 10–12 minutes
- Total Time: Around 1 hour, including cooling
Servings:
This recipe yields about 20 to 22 cookies, depending on your scoop size. You can double it for gatherings or holiday trays.
Difficulty Level:
Beginner-friendly.
If you’ve ever made boxed brownies or baked basic cookies, you can make these. There are no complicated steps—just mix, chill, roll, and bake.
Required Kitchen Tools
You won’t need anything fancy—just the basics for cookie baking:
- Large mixing bowl – for the cookie dough
- Medium mixing bowl – for the cream cheese or dry mix
- Electric hand mixer or stand mixer – for creaming butter and cheese
- Silicone spatula – for scraping down the bowl
- Cookie scoop or two tablespoons – to portion out dough evenly
- Baking sheets – lined with parchment for easy cleanup
- Wire cooling rack – to cool the cookies evenly without overbaking
Ingredients for Gooey Red Cookie Treats
These cookies are built from a few key pantry and fridge staples:
- 1 box Red Velvet Cake Mix (15.25 oz)
Acts as the dry base—provides the red color, cocoa flavor, and structure. - 4 oz Cream Cheese, softened to room temperature
Adds tang and moisture; helps create that gooey bite. - ½ cup Unsalted Butter, softened (1 stick)
Creamed with the cream cheese for richness. Avoid margarine—it changes the texture. - 1 large Egg
Binds the dough and adds moisture. Room temperature works best. - 1 tsp Pure Vanilla Extract
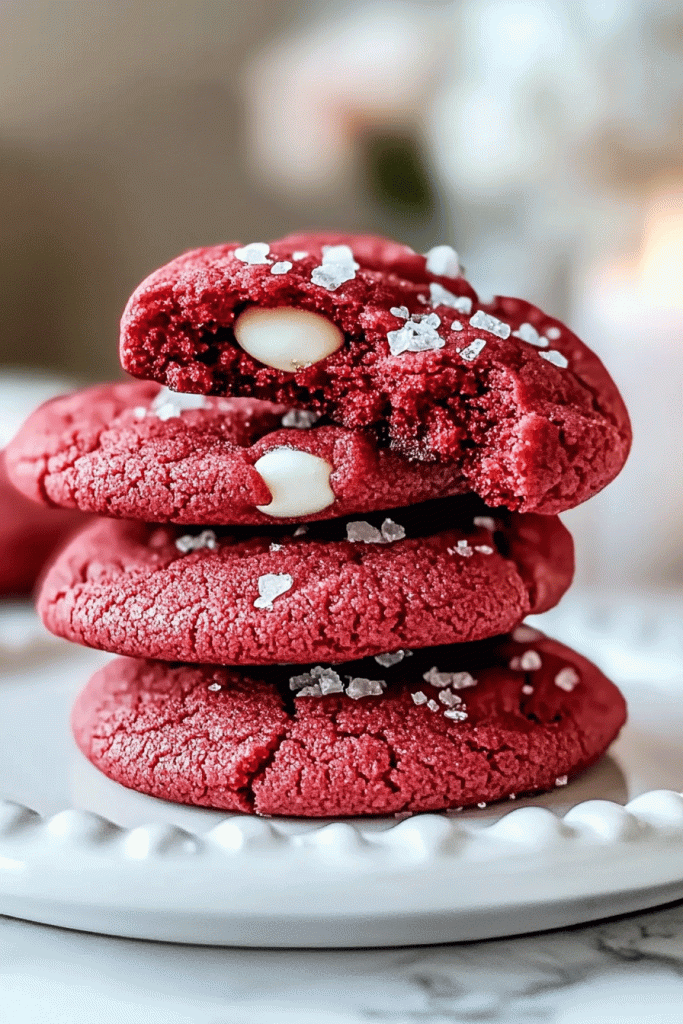
Adds warmth and depth, balancing the sweetness. - ½ cup White Chocolate Chips
Adds creamy, melty pockets throughout the cookie. You can use more if desired. - ½ cup Powdered Sugar
Used for rolling the cookie dough before baking. It creates a light, crackly crust and adds sweetness without heaviness.
Variations for Gooey Red Cookie Treats
These cookies are highly adaptable, and you can tweak them for taste or occasion:
- Add More Chocolate: Swap or add in dark, semi-sweet, or milk chocolate chips for more cocoa richness.
- Stuff with Cream Cheese Center:
Freeze teaspoons of sweetened cream cheese (cream cheese + powdered sugar) for 30 minutes. Then wrap cookie dough around each frozen ball before baking. It melts into the center while baking, giving you an oozy filling. - Mix In Nuts: Add ⅓ cup chopped pecans or walnuts to the dough for a toasty crunch.
- Use a Different Cake Mix: Try this same base recipe with strawberry or lemon cake mix for fruity versions.
- Make it Festive: Roll the cookie dough in red, green, or gold sugar sprinkles before baking to suit different holidays.
How to Make Gooey Red Cookie Treats – Step-by-Step Instructions
These cookies come together quickly, but a few careful steps will help you get that perfectly soft, gooey texture.
1. Cream the Butter and Cream Cheese
In a large mixing bowl, use a hand mixer or stand mixer to beat ½ cup softened unsalted butter and 4 oz softened cream cheese together. Mix on medium speed for 1–2 minutes, until it looks smooth and fluffy.
Tip: Make sure both are at room temperature. Cold butter won’t cream properly, and cold cream cheese can make the dough lumpy.
2. Add Egg and Vanilla
Once smooth, add 1 large egg and 1 teaspoon vanilla extract. Mix again on medium speed until fully incorporated. The mixture should be pale and creamy.
3. Add the Cake Mix
Slowly add the full box of red velvet cake mix to the wet ingredients. Mix on low speed or stir with a spatula until no dry streaks remain. The dough will be thick and sticky—this is normal.
Note: If the dough feels too soft, you can refrigerate it for 10 minutes before the next step to make it easier to handle.
4. Fold in White Chocolate Chips
Using a spatula, gently fold in ½ cup white chocolate chips. Stir just until the chips are evenly spread through the dough.
5. Chill the Dough
Cover the bowl with plastic wrap and chill the dough for at least 30 minutes. This helps prevent the cookies from spreading too much in the oven and deepens the flavor.
Optional: Chill overnight if you want more intense color and a slightly firmer texture.
6. Preheat Oven and Prepare Baking Sheets
While the dough chills, preheat your oven to 350°F (177°C). Line two baking sheets with parchment paper or silicone baking mats.
7. Scoop and Roll in Powdered Sugar
Use a cookie scoop or spoon to portion the dough into 1.5 to 2 tablespoon-sized balls. Roll each ball lightly between your palms to round it out.
Then, roll each ball in powdered sugar to coat it generously. This gives the cookies a delicate crackle look after baking.
8. Bake the Cookies
Place the cookies on the prepared baking sheets, leaving about 2 inches between each. Bake in the preheated oven for 10 to 12 minutes.
The edges should look set, but the centers will still appear slightly soft. That’s how you’ll get the gooey middle once cooled.
9. Cool on the Pan First
Let the cookies sit on the baking sheet for 5 minutes after taking them out of the oven. They’ll finish setting up and become easier to move.
Then, transfer to a wire rack to cool completely.
Serving and Decoration
These cookies look beautiful on their own, but here are a few ways to make them even more special:
- Dust with extra powdered sugar once they’re cool for a snow-dusted finish.
- Drizzle with melted white chocolate for a bakery-style touch.
- Add a few white chocolate chips on top right after baking for extra visual appeal.
- Serve warm for that gooey center—or cold for a denser, fudgier texture.
Storing Gooey Red Cookie Treats
These cookies store well and can even be made ahead:
Room Temperature:
- Store in an airtight container for up to 4 days.
- Keep them in a cool, dry spot away from direct sunlight.
- To maintain softness, you can place a slice of bread in the container. It helps keep the cookies from drying out.
Refrigerator:
- Cookies will last up to 1 week in the fridge. Let them come to room temperature before serving for best texture.
Freezer:
- To freeze dough: Scoop dough balls and freeze on a tray. Once frozen, transfer to a freezer bag. Bake from frozen, adding 1–2 extra minutes.
- To freeze baked cookies: Let them cool fully, then place in a freezer-safe bag. Freeze for up to 2 months.
Tips and Tricks for Success
- Use room temperature ingredients: Softened butter and cream cheese cream better and give the best texture.
- Don’t skip chilling: Chilled dough means thicker, chewier cookies with less spread.
- Don’t overbake: The center should look slightly underdone when you pull them out. They’ll firm up as they cool.
- Use parchment paper: This prevents sticking and helps the bottoms bake evenly.
- Double the batch: These cookies go fast—especially at parties. You can easily double the recipe.
Nutrition
Here’s an approximate nutrition breakdown per cookie (based on 22 cookies per batch):
| Nutrient | Amount per Cookie |
|---|---|
| Calories | 160 |
| Total Fat | 9g |
| Saturated Fat | 5g |
| Cholesterol | 25mg |
| Sodium | 120mg |
| Total Carbohydrate | 18g |
| Sugars | 10g |
| Protein | 1g |
Values may vary based on exact ingredients used.
PrintGooey Red Cookie Treats
Yield: About 20–22 cookies
Prep Time: 20 minutes (+30 minutes chill time)
Bake Time: 10–12 minutes
Total Time: ~1 hour 10 minutes
Ingredients
-
1 box (15.25 oz) red velvet cake mix
-
4 oz cream cheese, softened
-
½ cup (1 stick) unsalted butter, softened
-
1 large egg
-
1 tsp pure vanilla extract
-
½ cup white chocolate chips
-
½ cup powdered sugar (for rolling)
Instructions
-
Cream the butter and cream cheese in a bowl until smooth.
-
Add the egg and vanilla, mixing well.
-
Add the cake mix and mix until a soft dough forms.
-
Fold in the white chocolate chips.
-
Cover and chill the dough for 30 minutes.
-
Preheat oven to 350°F (177°C). Line baking sheets with parchment paper.
-
Scoop dough into 1.5–2 tablespoon balls. Roll each in powdered sugar.
-
Place on baking sheet 2 inches apart. Bake for 10–12 minutes.
-
Let cookies cool on the baking sheet for 5 minutes, then transfer to a wire rack.
Gooey Red Cookie Treats FAQs
Q: Can I use low-fat cream cheese?
A: Full-fat cream cheese is best for texture and flavor. Low-fat versions may make the cookies spread more and lose some richness.
Q: Why chill the dough?
A: Chilling prevents the cookies from spreading too much during baking. It also gives a thicker, more tender center.
Q: Can I make the dough ahead of time?
A: Yes. You can refrigerate the dough for up to 48 hours before baking. Let it sit at room temp for 10–15 minutes if it gets too firm to scoop.
Q: How do I know when the cookies are done?
A: The edges will look set, but the centers should look soft. Don’t wait for them to firm up in the oven—they’ll finish setting as they cool.
Q: Can I add food coloring to make them more red?
A: You can. Add a drop or two of red gel food coloring to enhance the color, especially if your cake mix looks dull.
Conclusion
Gooey Red Cookie Treats are a cozy, crowd-pleasing dessert that feels homemade but starts with an easy shortcut. They’re soft, chewy, and filled with creamy sweetness—perfect for holidays, cookie swaps, or just because. With just a few pantry staples, you get a batch of cookies that feel special, look beautiful, and taste even better.
If you’re short on time but still want something thoughtful and delicious, this is the recipe to keep on hand.